This is an entry in my Building a NAS project.
The Hardware
I have decided to run FreeNAS as my OS on my NAS. This requires 8 GB of RAM and ECC ram is highly recommended. (Required or not is debated) I also need the ability to plug in 4 SATA hard drives. I want the system to use as little power as possible.
Some other, smaller features that I really would like is to have is USB 3.0, removable drive bays, and AES-NI support on the CPU.
DIY ITX build
One idea I considered was to build a small ITX system myself.
- Case: Cooler Master Elite 110 ($30)
- PSU: Seasonic G Series 360W ($60)
- Motherboard / CPU: Asrock N3150-ITX ($75)
- RAM: 8 GB DDR3L ($30)
Total is $200. A pretty decent setup. The case is limited to three non-removable drive bays. No ECC RAM support. I could most likely add these features for additional costs, but if I spend more money, I could get a:
HP Microserver Gen 8
I saw this product and it seemed to fit my needs very well. It’s an ITX cube case with a 4 removable drive bays, a dual-core Celeron G1610T, and 4 GB of ECC DDR3.
It was a little expensive at $350, but I decided to splurge and get it. My reasoning was that it was only $100 more than my ITX design, and it was designed specifically to do exactly what I wanted.
Memory Upgrade
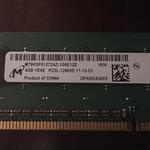
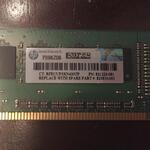
The first issue with the stock Microserver was that it only had 4 GB of RAM. FreeNAS requires 8 GB. I went to my trusty source of computer hardware (Ebay) and bought a single 8 GB stick of DDR3-1600 that was both ECC and was unbuffered. Unbuffered ECC ram seems to be much less common than registered ECC memory, and consequently, more expensive. I paid $45 for the 8 GB of memory, giving me a total of 12 GB of RAM.
There are only two memory slots in the HP Microserver and only 16 GB is supported. (This is apparently a chipset limitation, 32 GB total is supported, but requires 4 DIMMS) I picked an 8 GB stick so that if I ever wanted to upgrade to the full 16 GB, all I would need is another 8 GB stick.
CPU Upgrade
I also decided to upgrade the Celeron CPU. Primarily because virtualization was a possibility in the future (after I get the NAS stuff set up) and also because drive encryption was a feature I wanted. The Celeron does not support VT-d (the ability to pass devices straight to a VM) nor AES-NI.
A caveat of upgrading the CPU is the cooling situation in the Microserver. There is a small all-aluminum heatsink on the CPU and the only airflow is created by the rear 120 mm fan. I’m sure it’s fine for a 35 W CPU, but adding a CPU with a higher TDP may create a cooling issue.
Ideally, some kind of low-voltage Socket 1155 Xeon would be the best choice. However, I realized that the Xeons that fit the bill were going for a bit more than $100 at the cheapest. I also found that the absolute cheapest option was a 90 W TDP Xeon E3-1220 v1, which could be had for $50.
I had to make some trade-offs. I really wanted the features the Xeons brought, not their processing power. I was also a little budget constrained after splurging on the Microserver. So I decided to purchase a full TDP Xeon and disable two cores. This would (hopefully) half the TDP. The new 40 W TDP was still higher than the stock CPU’s TDP of 35 W, but I am pretty confident it will work just fine. I don’t plan to run the CPU at 100% for any extended time anyway.
I ended up finding a Xeon E3-1225 v1 for $50. This is the same CPU as a E3-1220 v1 except for the E3-1225 v1 has integrated video and a 15W higher TDP. The Microserver has integrated video built into the motherboard, so the on-CPU video won’t be used. This (hopefully) lowers the TDP to 80 W. I also disabled 2 cores, which (hopefully) brings the effective TDP down to 40 W.
Conclusion
I have the HP Microserver in hand and have upgraded the memory to 12 GB and the CPU to a Xeon E3-1225 v1 with two disabled cores. I am very happy with my decision so far. The Microserver looks very capable and very small, which is exactly what I wanted.
I am still deciding on the hard drive config. I am still leaning of a 3 drive mirror of ‘new’ 2TB drives from Ebay.
Postscript:
Apparently, I failed to take any pictures of the Microserver on this day. D’oh! Here are (some terrible) pictures of the CPU and the memory stick I added.
- Xeon CPU
- 8GB Memory Stick
- 8GB Memory Stick


